Unit Testing React Components
Basic Example
ToggleText.js
import { useState } from "react"

const ToggleText = () => {
    const [showText, setShowText] = useState(true)
    return (
        <>
            {showText && <p data-testid="text">Hello world</p>}
            <a data-testid="toggle" onClick={() => setShowText(!showText)}>Toggle</a>
        </>
    )
}

export default ToggleText
ToggleText.test.js
import { fireEvent, render, screen } from "@testing-library/react"
import ToggleText from "./ToggleText"

test("toggles text", () => {
    render(<ToggleText />)
    const text = screen.getByTestId("text")
    const toggle = screen.getByTestId("toggle")
    expect(text).toBeInTheDocument()
    fireEvent.click(toggle);
    expect(text).not.toBeInTheDocument()
})
To run the test...
npm run test
Output:
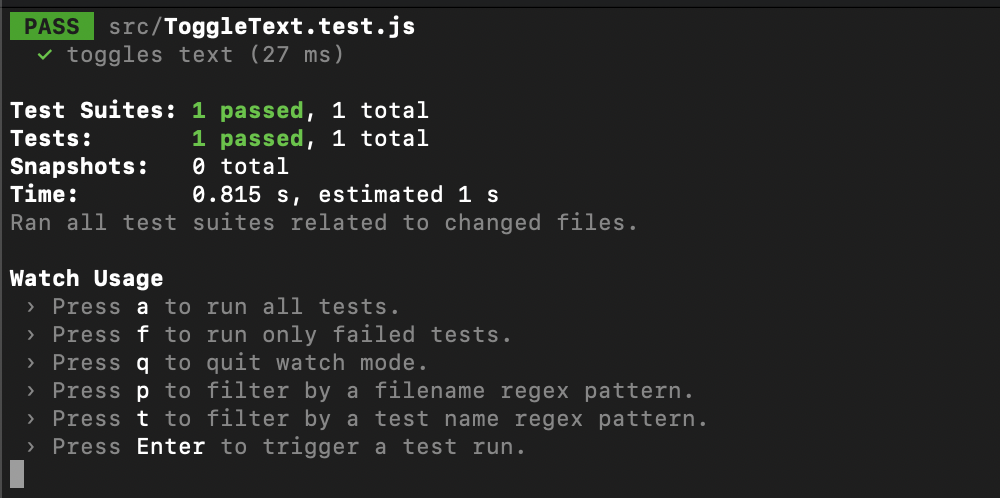
Jest Unit Testing React Example
The above example uses Jest.
By default, create-react-app will include all of the dependencies needed for using Jest and react-testing-library...
create-reat-app default package.json
{
  ...
  "dependencies": {
    "@testing-library/jest-dom": "^5.16.5",
    "@testing-library/react": "^13.4.0",
    "@testing-library/user-event": "^13.5.0",
    "react": "^18.2.0",
    "react-dom": "^18.2.0",
    "react-scripts": "5.0.1",
    "web-vitals": "^2.1.4"
  },
  ...
}
Notice how create-react-app includes the following 3 testing dependencies automatically:
@testing-library/jest-dom - a library used to extend Jest so it's easier to assert the state of the DOM
@testing-library/react - A React framework written on top of the @testing-library
@testing-library/user-event - a helper library for dispatching browser based events to simulate user activity in your unit tests
What is @testing-library?
All of these dependencies are part of @testing-library, a light-weight family of packages for testing UI components. The create-react-app tool includes these 3 packages by default so you can easily unit test components in a user-centric way.
By using the @testing-library, it's easy to do things like...
const text = screen.getByTestId("text")
and...
fireEvent.click(toggle);
It's important to note that @testing-library IS NOT specific to React or Jest. Developers use @testing-library to unit test UI components for other frameworks like Angular and Vue.
In fact, you can use @testing-library outside of Jest altogether. @testing-library works with other test frameworks like Jasmine too...
Jest vs react-testing-library
What is Jest?
Jest is a testing framework for JavaScript. Jest allows you to write unit tests against JavaScript code.
Here is a basic example of a unit test written in Jest...
describe('sum', () => {
  it('sums two values correctly', () => {
    expect(sum(2, 2)).toBe(4);
  });
});
This unit test asserts that the function sum() correctly returns a value for the given inputs.
Notice the use of describe, toBe, and expect. These are all part of the Jest testing framework.
Jest is a test runner. Using Jest with Node.js, you can run a suite of unit tests with a simple command like
npm run test
What is react-testing-library
The react-testing-library exposes APIs for testing React components in a more user centric way. This means allowing you to write unit tests referencing DOM nodes rather than React components.
Instead of testing the internal state of a React component, you can use react-testing-library to render DOM nodes and test the actual HTML output (like an end user would by actually using the site.
As mentioned, react-testing-library is a package of the more generic @testing-library.
Let's look at our same ToggleText.test.js file
import { fireEvent, render, screen } from "@testing-library/react"
import ToggleText from "./ToggleText"

test("toggles text", () => {
    render(<ToggleText />)
    const text = screen.getByTestId("text")
    const toggle = screen.getByTestId("toggle")
    expect(text).toBeInTheDocument()
    fireEvent.click(toggle);
    expect(text).not.toBeInTheDocument()
})
Notice how we import fireEvent, render, and screen from the react-testing-library.
Using these APIs we can render React components as DOM elements. This allows us to easily check DOM nodes.
The difference? Jest vs react-testing-library
Jest is a test runner. You don't have to use react-testing-library to use Jest. In fact, Jest is one of the most widely used JavaScript testing frameworks out there. While React is popular, there are lots of JavaScript projects that aren't using React or other UI component libraries.
Even backend web servers written in NodeJs can use Jest to unit test functionality.
This is vastly different from react-testing-library which is simply a framework written on top of @testing-library for easily testing DOM nodes.
You wouldn't use react-testing-library or @testing-library to test backend functionality but you can use Jest in both cases.
In other words, react-testing-library is specifically for testing React components. It doesn't rely on Jest and can be used without Jest (although Jest is by far the most popular and considered the de-facto test runner for JavaScript in today's world).
Alternatives to Jest include Mocha, Protractor, Enzyme, etc. These are other testing frameworks that allow you to write and run unit tests. You can use react-testing-library with mocha. You can't use Jest with mocha.
React Unit Testing Examples
Mock an HTTP request
ToggleText.js
import { useState } from "react"
import axios from 'axios'


const ToggleText = () => {
    const [showText, setShowText] = useState(false)
    const getData = async =>
        axios
            .get("https://dummyjson.com/products/1")
            .then(response => {
                const { data } = response
                const { id } = data
                if (id) {
                    setShowText(true)
                }
            })
            .catch(error => {
                setShowText(false)
            })
    return (
        <>
            {showText && <p data-testid="text">Hello world</p>}
            <a data-testid="toggle" onClick={() => getData()}>Toggle</a>
        </>
    )
}


export default ToggleText
ToggleText.test.js
import { fireEvent, render, screen, waitFor } from "@testing-library/react"
import ToggleText from "./ToggleText"
import axios from 'axios'


jest.mock('axios')


test("toggles text", async () => {
    axios.get.mockResolvedValue({
        data: {
            id: 1
        }
    });
    render(<ToggleText />)
    const toggle = screen.getByTestId("toggle")
    fireEvent.click(toggle);
    await waitFor(() => {
        expect(screen.getByTestId("text")).toBeInTheDocument()
    })
})
Notice how we use jest.mock() to mock the axios library in our test file.
Notice how we call mockResolvedValue() on our mocked axios instance to return an expected response.
Notice how we use fireEvent from the react test library.
Notice how we use waitFor() to only check for the presence of the text field after the mock HTTP response returns.
React Unit Testing Best Practices
In 2023, it is strongly recommended to use Jest as the test runner / framework for unit testing React components.
Unit tests should be written in a user centric way. This is largely achieved by using @testing-library as show cased in this tutorial. Using the packages within @testing-library allows you to run assertions against DOM nodes rather than testing internal React component state.
Using describe properly
Using the Jest test runner involves wrapping shared functionality in "describe" clauses...
describe('ToggleText', () => {
  it('should toggle text', () => {
    // ...
  });
  describe('when user clicks buttn', () => {
    it('should return the http response', () => {
      // ...
    });
    it('should display text, () => {
      // ...
    });
  });
  describe('when user does not click button', () => {
    it('should not return http response', () => {
      // ...
    });
    it('should not display text', () => {
      // ...
    });
  });
});
Notice how nested describes start with when
Notice how it starts with should
Set up repetitive components using beforeEach
Using beforeEach allows you to easily initiative components that will be used across multiple tests..
describe('ToggleText', () => {
  beforeEach(() => {
    text = 'Default text?';
    render(
      <ToggleText
        text={text}
      />
    );
  });
  ...
})
By using beforeEach, the same component will initialize before each test. This avoids having to write the same boilerplate time and again for each test.
You can use afterEach, beforeAll, and afterAll in a similar fashion. The point is to not reinvent the wheel for each test case.