How to Implement User Authentication in Java Web Apps
The multitude of enterprise workforce identities is rapidly growing, largely attributable to DevOps, automation, and an upsurge in enterprise-connected devices. Simultaneously, compromised identities remain one of the most common causes of a data breach.
According to a recent survey by the Identity Defined Security Alliance (IDSA), 94% of respondents had experienced identity-related incidents. Hence, the security and privacy of identities used on web apps should be a primary focus.
This article will highlight the user authentication methods that could save you from identity breaches and give you tips on how to integrate user identities into your Java web applications. Let's proceed to the fundamentals first.
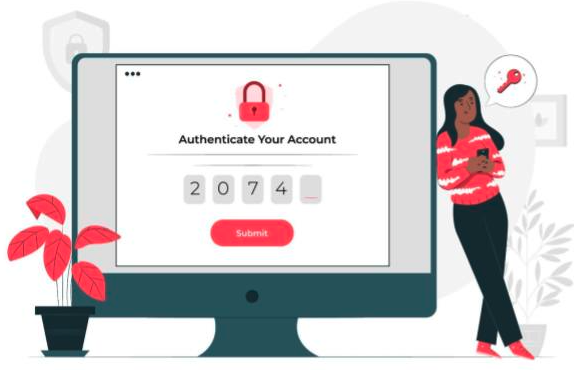
What is User Authentication?
The process of identifying users who seek access to a system, network, or device is known as user authentication. It is a way of preventing unauthorized users from accessing sensitive data.
Tasks of User Authentication
The following tasks are associated with user authentication:
● Identification
● Authentication
● Authorization
User Authentication Factors
The key elements utilized in user authentication are:
● Knowledge Factors: All aspects that users must understand in order to have access to a system are classified as knowledge factors. Usernames, IDs, passwords, and personal identifying information are all included in this category.
● Possession Factors: Possession factors are everything that users should have in order to log in. This category includes one-time password credentials, authenticator apps, YubiKey, and so on.
● Inheritance Factors: Inheritance factors are innate traits of individuals that validate user identification. This category includes fingerprint scanners, facial recognition, and other similar technologies.
Combining these methods into a multi-factor authentication process reduces the possibility of a hacker gaining unauthorized access to the secured network.
User Authentication Mechanisms
Authentication mechanisms are configurations that use a specific technology to recognize the user, such as a username and password or a one-time password.
The following user authentication mechanisms are most commonly used:
Basic Authentication
Basic authentication is a straightforward request and response mechanism that enables a server to obtain user credentials (usually a user ID and password). The client provides the authentication information to the server in an Authorization header.
Under Basic Authentication, the Following Things Happen
● A user requests access to a password-protected online page.
● The user's browser shows a dialogue box asking for the login information.
● The user credentials are sent to the server by the client.
● The server allows the user to connect to the specified domain and, if successful, returns the requested resource
How to Implement (Example on Spring Security)
Spring Security is a Java framework for developing enterprise applications with authentication, authorization, and other security features.
Let's look at how to use Spring Security to implement user authentication:
Project Structure

- Configure Your System: Configure default principal to role mapping for an authorized user in Spring Security.
@Override
protected void configure(AuthenticationManagerBuilder auth) throws Exception {
    auth.inMemoryAuthentication().withUser("admin")
        .password("admin")
        .roles("ADMIN")
        .and().withUser("user")
        .password("user")
        .roles("USER");
}
2. Make a Web Module: A web module is the smallest deployable and usable unit of online content. A web module is made up of web components and static web content files, such as images, known as web resources.
3. Add the Necessary Security Annotations: Spring Boot uses basic authentication to secure all HTTP endpoints. You can, however, further customise the security settings. For example, if you want to keep unauthorised users from accessing the greeting page then it can be accomplished by configuring the settings.
@Override
protected void configure(HttpSecurity http) throws Exception {
    http.authorizeRequests()
        .antMatchers("/api/candidates").hasRole("ADMIN")
        .antMatchers("/api/logging").permitAll()
        .and().formLogin();
}
4. Build, Package, and Deploy the Web Application using IntelliJ IDEA (IntelliJ IDEA allows you to create applications using JavaScript, TypeScript, React, Vue, Angular, Node. js, and other related technologies)
● Build: Using IntelliJ IDEA, you can have the basic application structure automatically set up according to the required standard, and you can obtain extensive coding help at all stages of development.
● Package: When you are ready to share your application with others by deploying it to a remote server, the compressed web archive (WAR) format is recommended.
● Deploy: To define the layout of your project output for it to be delivered, define the layout of a project's output in IntelliJ IDEA using artifacts.
5. Build, Package, and Deploy the Web Application Using Maven (Maven is a build automation tool that is mostly used for Java projects. It can also be used to create and manage projects in C#, Ruby, Scala, and other programming languages)
<dependency>
    <groupId>org.springframework.boot</groupId>
    <artifactId>spring-boot-starter-security</artifactId>
</dependency>
● Build: The maven-archetype-web app plugin will be used to construct a simple Java web application. If you’re interested in learning Java development, you can check out CodeGym. CodeGym is a gamified, interactive online Java programming course with ten levels. Each one includes brief lectures on Java theory and gamified tasks to help students maximise their knowledge. As you advance through the journey, access to resources becomes available in a sequential manner.

● Package: Take the compiled code and use the `mvn` command from the command line to package it. It then must be run in the same directory as the appropriate pom file.

● Deploy: Deploy transfers your packaged Maven module to another repository, which may be accessible by other non-local Maven builds. The deploy step is in charge of installing artifacts into publicly accessible repositories.
<plugin>
    <artifactId>maven-deploy-plugin</artifactId>
    <version>2.8.2</version>
    <executions>
        <execution>
            <id>deploy-file</id>
            <phase>deploy</phase>
            <goals>
                <goal>deploy-file</goal>
            </goals>
            <configuration>
                <file><!-- path-to-file --></file>
                <url><!-- url-of-the-repository-to-deploy --></url>
                <groupId><!-- group-id --></groupId>
                <artifactId><!-- artifact-id --></artifactId>
                <version><!-- version --></version>
                <packaging><!-- type-of-packaging --></packaging>
            </configuration>
        </execution>
    </executions>
</plugin>

Form-Based Authentication
Form-based authentication collects credential information and authenticates a user through a web form.
Under Form-Based Authentication, the Following Things Happen
● A customer requests access to a web page.
● If the client is authenticated, the server sends him to a login page.
● The client sends the login form to the server.
● If authentication is successful, the authenticated user's principal is checked to ensure that it is in a role that allows access to the resource.
● If the authentication fails, the client is sent to an error page.
How to Implement (Example on Spring Security)
1. Configure Your System: Configure the default principal to role mapping and add an authorized user to Spring Security.
@Override
protected void configure(AuthenticationManagerBuilder auth) throws Exception {
    auth.inMemoryAuthentication().withUser("admin")
            .password("admin")
            .roles("ADMIN")
            .and().withUser("user")
            .password("user") .roles("USER");
}
2. Make a Web Module: Web components and static online content files such as pictures, referred to as web resources, are included in a web module.
3. Make appropriate Security Annotations: This annotation allows you to define particular HTTP method limits as well as more general requirements that apply to all HTTP methods that do not have an explicit constraint provided.
4. Create the Login Form and the Error Page: You must generate a page containing the form that will be used to obtain the login information when using form-based login approaches.
5. Specify Security: All protection is outlined in the deployment descriptor of the application. The deployment description includes a security constraint that tells the server to offer a login form to collect user data.
6. Build, Package, and Deploy the Web Application using IntelliJ IDEA:
● Build: Using IntelliJ IDEA, you can have the basic application structure automatically set up according to the required standard, and you can obtain extensive coding help at all stages of development.
● Package: When you are ready to share your application with others by deploying it to a remote server, the compressed web archive (WAR) format is recommended.
● Deploy: To define the layout of your project output for it to be delivered, define the layout of a project's output in IntelliJ IDEA using artifacts.
7. Build, Package, and Deploy the Web Application Using Maven:
● Build: The maven-archetype-web app plugin will be used to construct a simple java web application.

● Package: Take the compiled code and use the `mvn` command from the command line to package it. It then must be run in the same directory as the appropriate pom file.

● Deploy: Deploy transfers your packaged Maven module to another repository, which may be accessible by other non-local Maven builds. The deploy step is in charge of installing artifacts into publicly accessible repositories.
<plugin>
    <artifactId>maven-deploy-plugin</artifactId>
    <version>2.8.2</version>
    <executions>
        <execution>
            <id>deploy-file</id>
            <phase>deploy</phase>
            <goals>
                <goal>deploy-file</goal>
            </goals>
            <configuration>
                <file><!-- path-to-file --></file>
                <url><!-- url-of-the-repository-to-deploy --></url>
                <groupId><!-- group-id --></groupId>
                <artifactId><!-- artifact-id --></artifactId>
                <version><!-- version --></version>
                <packaging><!-- type-of-packaging --></packaging>
            </configuration>
        </execution>
    </executions>
</plugin>

That’s it, you’ve got your user authentication implemented.
Conclusion
One of the fundamental concepts of security is user authentication. It should be implemented by a company not to face severe consequences of hacking, which include downtime, heavy penalties, lawsuits, damaged reputation, data theft, and ransom.
We gave you the basic steps of how to implement user authentication in Java web apps, hoping it saves you a lot of time and money.
Git Repository Link: